 +1 929 201 3767
 info@embroideredpatches.us
 Login
Login



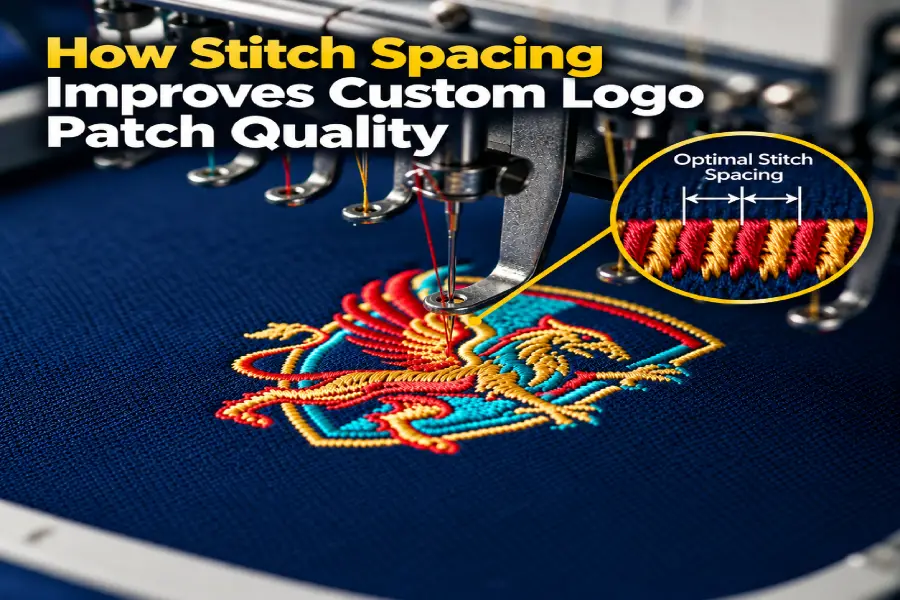
How Stitch Spacing Improves Custom Logo Patch Quality
Why is the stitch density significant when designing a logo patch? The quantity and pattern of stitches affect the depth, color shade, detail, and neatness of the final product.
Selecting Ideal Thread Patterns To Maximize Overall Visual Contrast
The logo may seem fine when viewed on the computer screen, but its look may be entirely different after it has been embroidered on the textile material.
The reason is quite straightforward: embroidery converts a flat artwork into a tangible design that consists of hundreds or thousands of single threads. There are a lot of things to consider here, but one of them is definitely stitching density, which plays an important role in creating a final design.
If there are too few stitches, there will be gaps, exposed fabric underneath, and weak-looking colors. When there are too many stitches, the logo will become stiff and crowded. The correct stitch density makes the logo neat, bright, and professional-looking.
Having knowledge about embroidery density assists businesses, clubs, groups, and organizations in coming up with logo patches that resemble the original image and function well on actual fabric.
Balanced Stitching Creates A Cleaner Logo Surface
Embroidery density refers to the number of stitches in relation to a certain area. High density means that there are a lot of stitches in a certain area. Lower density means that fewer stitches are used in one particular area.
In the case of a logo patch, balance in the density results in a uniform appearance of the patch without it looking too crowded. In most cases, the large areas require an adequate number of stitches to cover the fabric adequately. But density need not be the same for all parts of the design.
For instance, the design for the big background image will not be the same as the one required for the thin border or small lettering.
Effective digitizing ensures that the individual sections are assigned the right type of stitches. This results in a better-looking logo and ensures that it is recognizable.
Build Heavy-Duty Durability For Harsh Outdoor And Tactical Environments
Density of the border stitching is a determining factor in the durability of the patch itself. Low-density merrowed borders easily get worn out and fray when rubbing against other materials or washing in industrial conditions.
Stitching the outer edges tightly together ensures that all edge threads are firmly fixed in place and don’t fray or peel off over time.
Choosing to make your own company logo patches by using high-density outer borders ensures that your workwear logos will be protected and presentable despite harsh industrial environments.
Proper Coverage Makes Colours Look Richer
Thread coverage has an impact on the colour strength. If there is too much space between stitches, then the backing material can be seen through the stitches. It can dilute the bright colour of a brand’s logo.
The appropriate stitch density allows for covering the desired area better. Full coverage with stitches is used for obtaining the traditional look of embroidered logo patches, while partial coverage allows for incorporating the base fabric into the patch design.
Higher Density Adds Texture And Visual Depth
The embroidery process has one quality which cannot be entirely duplicated by printed graphics, and that is the ability to touch the raised surface. Thread creates a dimensional surface, which, combined with varying stitch direction and density, can give your logo extra depth.
Increased stitch coverage will create a more dimensional appearance. Variations in stitch direction will cause some areas to reflect the light differently than others, increasing visual interest.
This technique is effective for the use of bold symbols, emblems, and letterings. It helps to create a raised texture, which makes certain elements of the design pop out from the fabric.
Professional Digitizing Protects Logo Clarity
Embroidery machines follow a digital stitching file rather than reproducing an image. In digitizing, the artwork is transformed into stitch outlines, directions, fills, borders, and other instructions for the machine.
Digitizing has a huge impact on the end product. A professional digitizer can determine where stitching needs to be denser, less dense, and where overlapping will take place. Professional digitizing will also include consideration of underlay and stitching directions to help control the outcome.
When placing orders for custom patches USA made, getting a digital proof before manufacturing is very helpful. The buyer has a chance to verify the dimensions, lettering, colors, borders, and design of the logo patches before manufacturing all of them.
Lower Density Can Give Designs A Lighter Finish
Not all patches have to be totally stuffed with stitches. The lower density of the stitching will give a lighter look and will still make some of the backing material visible.
Such a technique can be used especially effectively when the background color of the fabric belongs to the design elements. In such a case, the designer does not cover the whole patch with the threads but leaves the fabric to serve as an additional visual layer.
It all depends on the particular logo. Sometimes the symbol is enough to be partially covered, while sometimes more coverage is needed to preserve the continuity of the picture.
Excessive Density Can Make Patches Look Heavy
However, there comes a stage at which increasing the number of stitches does not enhance the design anymore. Too many threads crowded in one spot can make the patch rigid and heavy.
The overdensity of embroidery can result in problems in production. Multiple times going through the same spot can put additional strain on the material. The excess thread in some spots can affect the surface.
Professional designs are supposed to achieve controlled density as opposed to maximum density. The logo patch must contain an adequate amount of thread to make it appear finished finished but remain flexible. A complete material guide can help explain how the right combination of materials and thread contributes to the overall quality and flexibility of the patch.
The Right Density Improves The Finished Patch
A good stitch density ensures that a patch appears neat, durable, and professionally made but without overpowering its design.
Stitching density ensures that there is sufficient coverage of the thread in the design so that colors appear rich without losing out on the important details of the artwork.
This ratio is highly effective when making personalized military patches, since bold typography, icons, and borders usually have to be recognizable. With properly adjusted stitching, it becomes possible to create these items and make them stand out with their raised look.
However, the most favorable outcome is not obtained by using the maximum number of stitches. Instead, the number of stitches will be dependent on the size of the design, material used, and intricacy of the design. Through this, an excellent patch will be produced.
Simple Basics Behind Patch Stitching Levels
What does embroidery density mean?
Embroidery density describes the number of stitches put in a designated area of the design. High density means more stitching and fewer gaps, but low density means less stitching and more gaps in the area.
What is the impact of low embroidery density in logo patches?
With low density, there will be gaps between rows of thread, leaving the background fabric visible. As a result, the design will lack contrast and colour, while the logo will look blurry.
Can embroidery density be too high on a custom patch?
Yes, when the density is too high, it will create too many threads in one small space. It results in thread entanglement, needle breakage, lumpy areas, and distortion of the backing material, leading to puckering of the finished patch.
How can the density of the stitches impact the small text in custom logo patches?
The small text will need a little less dense stitching and also less dense thread. If there is too much density when there are tiny letters, there will be too much overlap in the stitching, and it will become very difficult to read the letters.
What is the recommended stitching density for full-coverage patches?
Full-coverage patches generally have a tatami fill density of about 0.4mm stitch distance. It gives full thread coverage on the entire patch area without making the fabric base hard.
Conclusion
Embroidery density is one of those subtle factors that greatly affect the outcome of a personalized logo patch. Density affects color saturation, texture, detail, weight, and sometimes even logo recognition.
The best outcomes will be attained by achieving balance. Minimal stitches may result in holes and weaknesses in the embroidery process, while many stitches may result in stiffness and crowded detail work.
When the density matches the piece of art, fabric, size, and stitch direction, then the end product is guaranteed to be clean and professional-looking.
For those interested in producing an embroidered logo patch, knowing about density will make it easier for them to communicate their needs and evaluate the outcome.

As a fashion analyst behind EmbroideredPatches.us, I love exploring the world of patches and all the creativity they bring. On this blog, I share tips, ideas, and simple techniques for making patches that last and look great. I explain colors, designs, and materials in a way that’s easy to follow, so anyone can try customizing their own patches. From small personal projects and gifts to collections and hobbies, patches are a fun way to add personality, style, and charm to clothes, bags, hats, and more. My goal is to inspire readers to bring their patch ideas to life, enjoy the process, and celebrate every little detail along the way.